
How to make an HTTP GET/POST request from an Alexa Routine
Do you want to make an external GET/POST HTTP request to a URL from within an Alexa Routine? Here's how.

There are plenty of reasons to fire an HTTP GET or POST request from inside an Alexa Routine. Trigger an external system by voice, kick off an IFTTT applet, or hit an API that starts a smart-home automation. With a Voice Monkey Flow it’s a three-step job.
Before you start
You’ll need:
- The Alexa app and the Voice Monkey skill enabled. Get started if you haven’t already.
- The Hobby or Ultimate plan, or a legacy Pro or Premium plan. Web Request is a premium Flow node, so it won’t run on the free plan. See pricing.
You don’t need a Speaker for this one. The Flow runs in the cloud, and Alexa only has to start it.
Step 1 — Create a new Flow
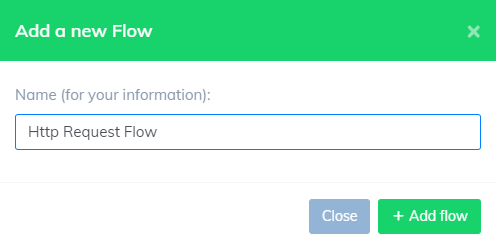
In the console, open Flows and click Create Flow. Give it a name you’ll recognise, such as “Call My Webhook”. Every Flow begins with a Start node.
Step 2 — Add a Web Request node
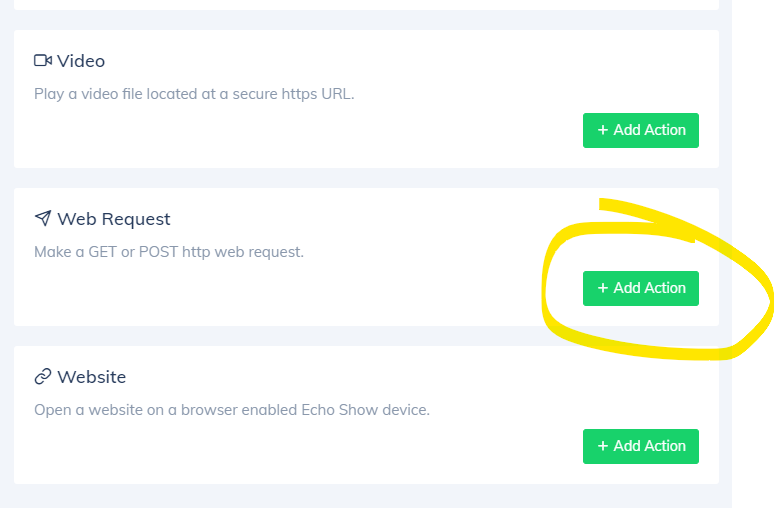
Click Web Request under Advanced in the Nodes list, or drag it onto the canvas. Drag from the Start node’s output dot to the Web Request node to connect them, then click the Web Request node to open its settings.
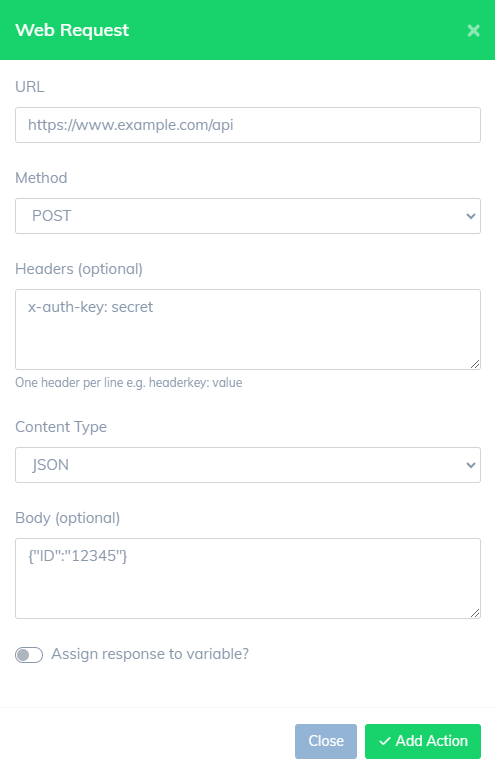
Fill in the request:
- Method: GET, POST, PUT or DELETE.
- URL: the address to call. It can include variables such as
{VARIABLE_NAME}and built-ins such as{VM.TIME.HOUR}, which are filled in when the Flow runs. - Headers: click Add Header for anything the API needs, such as an
Authorizationheader. - Content Type and Request Body: shown for every method except GET. Pick JSON, Plain Text or Form URL-Encoded, and Voice Monkey sets the matching
Content-Typeheader for you. - Wait for response: leave it off to fire and forget. Turn it on if a later node needs the reply.
- Timeout: how long to wait, up to 60 seconds. The default is 20.
Click Create Flow to save. You can test the request straight away with the Trigger button at the top of the editor.
Step 3 — Trigger the Flow from an Alexa Routine
Click the Start node. Its Request Ref is the 4-digit number that starts this Flow from Alexa. Click Show routine instructions.
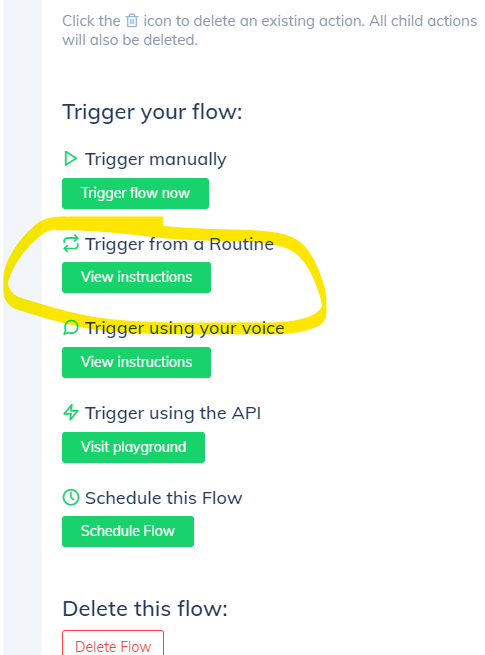
The instructions give you the custom command for each Alexa language. In English it’s ask voice monkey to start flow 1372, using your own Request Ref.
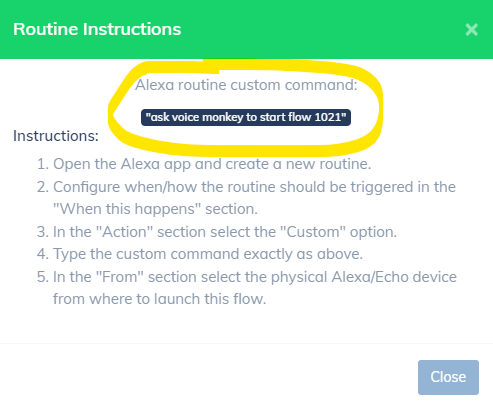
In the Alexa app, create a new Routine:
- When this happens: whatever should fire the request, such as a voice phrase, a time of day, a sensor or a button press.
- Add action → Custom: type the command exactly as shown, for example
ask voice monkey to start flow 1372. - From: pick the Echo that should run it.
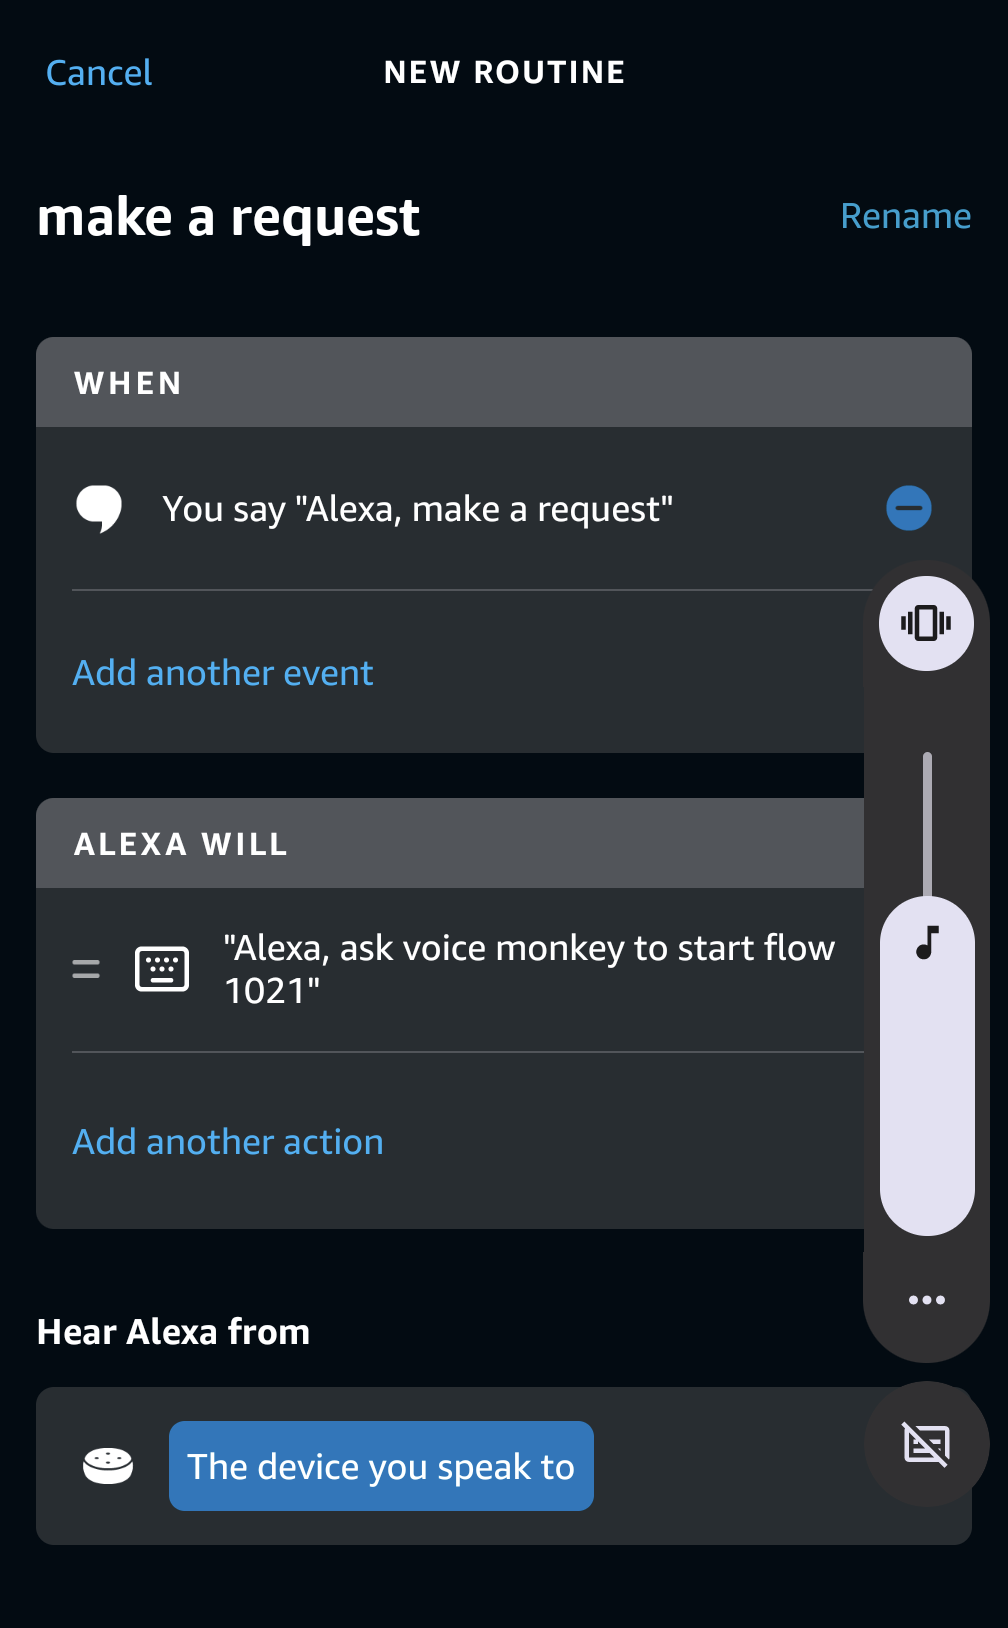
Now every time the Routine runs, Alexa starts your Flow and Voice Monkey makes the HTTP request to the URL you set. Magic.
Going further
- Speak the reply. Turn on Wait for response, then add a Speech node after the Web Request. The Web Request settings show the node’s Response Reference, for example
{WEB_RESPONSE.2.body}. Swap.bodyfor.status,.ok,.headers.<name>or.json.<path>to pick out a single value, such as{WEB_RESPONSE.2.json.temperature}. - Pass values in. Add
var-ROOM=kitchento an API call that starts the Flow, and use{ROOM}in the URL or body. - Start it other ways. The same Flow can run on a schedule (Hobby and Ultimate), from the Flows API, from an inbound webhook or from another Flow. See Flows for everything a Flow can do.